How to Replace a Threshold on an Exterior Door
December 7, 2021In this video we will walk you through how to replace a threshold on an exterior door.
You can view the video here, how to replace a threshold on an exterior door

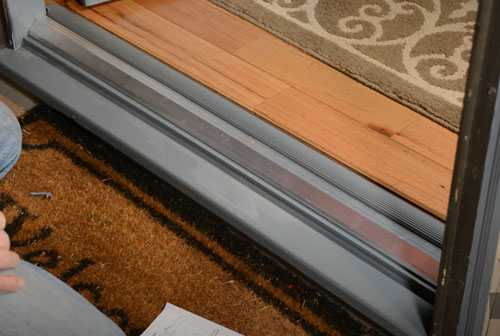
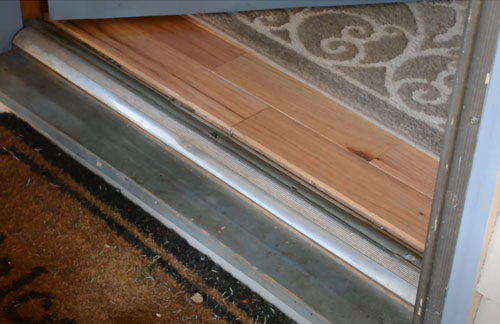
We start with showing our old worn-out threshold at our front door. We go over why it needs to be replaced. In our case, we had new hardwood floors installed and the door was cut off to accommodate the floor being higher. However the people that installed the floor and cut the door, did not raise the threshold. As a result we had about a 3/4 inch gap from the threshold to the bottom of the door. This was letting a LOT of cold air in (and hot in the summer) and insects year round. The threshold also needed replacing because it was old and worn out.
Next we show how to remove the old threshold. In our case there were only three screws. They are hidden under the rubber strip that is supposed to contact the bottom of the door. The screws are the only thing holding the threshold in place. It may take a little work but it should come up at this time.
Next we show show how we built up the base to accommodate the higher floor. We used 2 layers of 1/4 inch plywood cut to fit. Then trimmed the new threshold to fit the opening. Before installing the threshold, we painted the base so it would look better. Then we installed the aluminum base of the threshold. Next is what may be the hardest part is to install the rubber strip that contacts the bottom of the door to make the seal. We will demonstrate the best way to install it. This is the part that most people find to be the most challenging. With a little guidance, it is not too hard to install.
Then we show the finished threshold and show how well is seals. In our case there was a very small gap on the left side and we later added a small shim to adjust that. In the end we had a new threshold that looked and worked much better.
Thank you for visiting our video about “How to replace a threshold on an exterior door“.

Please subscribe to our YouTube Channel and click on LIKE on our videos.
Thank you for visiting and have a great day.
This video is NOT sponsored. Some product links are affiliate links which means if you buy something we’ll receive a small commission.
Below are links to the equipment we used making this video.
Nikon D7100 DSLR
GoPro HERO9 Black:
Rode Wireless Go Microphone
Neewer LED Video Light kit
We also have a new camera, a Canon 90D, we will be making 4K video with this camera
Please give this video a THUMBS UP and SHARE it with your friends.
Please LIKE and SUBSCRIBE Support from viewers like you is what keeps us going.
Thank you for your support.
Visit us on Facebook:
The focus of our YouTube Channel is to help you save money by doing things yourself!
Please visit our new YouTube Channel
Bucket List Time with Ann and Wayne
Back to our BLOG’s
Thank you

